Heated grips are great for extending your riding season and staying comfortable when the temperature drops. When it comes to choosing heated grips you essentially have two options: cheapo panels that go beneath your existing grips, or complete assemblies with integrated heating elements. While they tend to be more expensive (in the $60 to $160 range) and a little bulky, integrated kits usually work better and come with higher-quality controls and wiring.
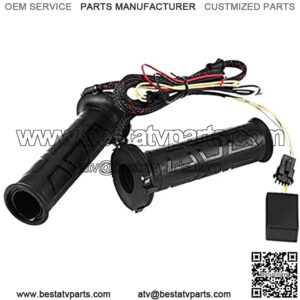
Integrated heated grips—wherein the heating elements are molded into the assembly—offer better performance, appearance and durability than universal under-the-grip heating panels.
Before you can install your new grips you’ll need to remove the old ones. Getting your OEM bar-ends off can be a bear, so use a T-handle for leverage and hold the bar-end with a pair of channel locks and a rag to keep the weight from rotating. Use a razor blade to slice off your old grips (no going back now!) and then scrape off any glue residue and wipe the bar and throttle tube clean with a rag doused in isopropyl alcohol or carb cleaner.
You can usually use compressed air to blow your old grips off the bars, but a razor blade will make exceptionally quick work of the job. Be careful not to slice into the plastic throttle tube.
Depending on the kit, you may have a dial or control switches that need to be mounted in a convenient place. Regardless of how easy or visually appealing it might be to place said switches on the right side of your cockpit, don’t do it. You want those controls as close to your left grip as possible so they’re easy to use. Some kits, like the Koso Apollo grips I installed for this article, have the controls build right into the flange. That means you can operate them without removing your hand from the controls. It also makes for a really clean installation.
When it comes to running the grip wiring back to your battery, it’s best to route it along a frame rail away from pinch points and moving parts, which often means removing some bodywork or perhaps the tank. Secure the wires with zip ties and make sure you leave enough slack at the right grip and headstock to accommodate full throttle and full steering sweep. If your bike’s bodywork is a nightmare to remove, you can use a fish tape to push the wires from the headstock back to the battery.
Take your time running the wiring back to the battery, and don’t be afraid to use lots of zip ties. Removing the bodywork is a pain, but it provides the access needed to do the job right.
The final step is to get the grips powered up, and with most kits it’s as easy as slipping the supplied fused ring terminals under the battery bolts. As always, you’ll want to disconnect the negative (black wire) terminal first and affix it last to avoid an unpleasant and potentially dangerous short. Most accessories come with fused power hookups, but if not it’s important to wire in a fuse of the appropriate amperage (typically 5 to 7.5A) to protect against shorts. And you should review your owner’s manual to make sure you’re not overburdening your bike’s electrical system.
Route the grip wires along your bike’s other cockpit wiring to keep it tidy. Check to see that you have ample slack to accommodate full rotation at the throttle and full steering lock at the handlebar.
About handle grip heater
“heated hand grips for motorcycles”
“heated handlebar grips bicycle”
“heated hand grips for snowblower”
“motorcycle heated grips install”
“heated hand grips for snowmobile”
“oxford heated grips”